Saturday, August 29, 2009

Homebaked Blueberry Muffins


I bought a tiny box (1 cup worth) of blueberries from Isetan on Friday, as it was RM 8.90 (RM 1.00 cheaper than usual). A splurge as I haven't baked from fresh blueberries before. They're right when they say one shouldn't go shopping when you're hungry, or you'll end up doing impulse buying.

Now, Coldstorage at KLCC sold muffin pans that I needed, but I didn't have the measurement to make sure it'll fit my small oven or not. So, after bringing Panya back from the vet, we went out to look for a muffin pan, but to no avail. We found an ok baking supply store but they ran out of muffin pans and there was a long line due to a festive season coming.

I ended-up placing a standard sized muffin papercup into my aluminium jelly molds and baked them. They ended up turn out not too bad, fluffy and muffinny. =)

I used N00bcook's recipe which gave credit to the original Jordan Marsh Blueberry muffin recipe that worked quite well for me. Her pointers of use the middle part of muffin tray to be evenly baked is very useful. Becareful not to stir the muffin batter too much so the muffins wouldn't end up too dense. I actually handmixed my muffin batter than using an electric mixer as I halved the recipe. For those who have access to cheap blueberry, you could make a big batch (double or triple the recipe) and keep them in the fridge (fresh muffins in the mornings) or freeze them (ready muffin batter) for future.

Jordan Marsh Blueberry Muffins
Credits: Recipe from ‘True Blueberry’ by Linda Dannenberg
This muffin recipe is that of the famous Jordan Marsh’s
Framingham Store (which closed
down in 1983)

Ingredients:

(Makes 12 standard-size muffins)

2 cups all-purpose flour
2 teaspoons baking powder
1/2 teaspoon salt
110g lightly salted butter (or 1 stick), softened
1 1/2 cups sugar
2 large eggs
1/2 cup milk
2 1/2 cups fresh (or frozen) blueberries

Directions:

  1. Preheat oven to 180C (350F).
  2. Sift the flour, baking powder and salt together into a medium bowl & set aside
  3. In the bowl of an electric mixer, combine butter and 1 1/4 cups sugar and cream at low speed until the mixture is smoothly blended. At low speed, add the eggs, one at a time, and blend
  4. Add the flour mixture and the milk a little at a time, alternating one with the other, and beat until blended, then remove the bowl from the mixer
  5. Add 1/2 cup of blueberries and gently fold them in with a wooden spoon or spatula. Add the rest of the berries and gently fold them in
  6. Place paper muffin cups into the muffin tin, and fill each cup with slightly more than 3/4 of batter. (Note: if not using paper cups, grease the muffin tin)
  7. Sprinkle the remaining 1/4 cup sugar over the muffin tops, then bake in the center of the oven for 25-30 minutes, until the muffins are golden brown and puffy
  8. Remove to a wire rack and cool in the tins for 1 hour before serving
To avoid spending RM 10 to make 12 muffins, I halved the recipe (genius suggestion from hubby) I ended-up with 6 and a half fluffy muffins to enjoy. It's even good enough that I'll give one to Samantha, a small thank-you for getting me nice seasalt and rosemary herbs from Greece. I can't wait to use them in my cooking! ^_^


Monday, August 17, 2009

Junk Story: Snille Castor Chair

Snille Chair

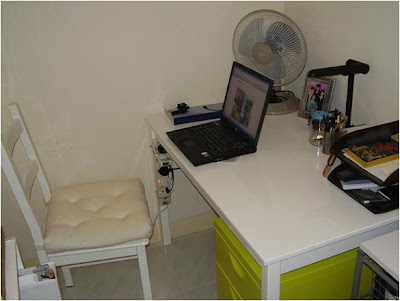
This would be my 2nd best find after the rattan chair. Found it at a corner of the building, missing 1 castor wheel. I think the old guards used it to sit while on duty.

The chair itself doesn't cost that much. RM 45.00. But, that was before I knew it didn't cost that much.

Replaced new wheel purchased at RM5.00 at IKEA


It was white, and fit the colour scheme of my corner, the plastic seat didn't suffer major damages (minus the missing wheel), otherwise, the cats have lots of fun sniffing it that I used a mixture of vinegar and dishsoap to sanitize the chair.

Thursday, August 06, 2009

Junk story: Rattan Chair


Rattan chair on the deck


My best find thus far. Sitting on top of a pile of trash was this almost flawless rattan chair. I know this chair is IKEA (cost around RM69), and only have a small hole on the seat. Not huge gapping hole, but a little tear.
Not too shabby, me thinks

Just right to have it out in the deck. I picked-up a white IKEA seat pad last week. They are kept in a cupboard while not in use since it's not water proof.

Tuesday, June 23, 2009

Homemade Granola Bars


I've wanted to try another recipe after reading MoneySavingMom's granola bars, the original recipe and instruction came with full pictures. I checked I have most of the ingredient the recipe called for and can't wait to rush home after work and try it out.

The difference between granola and granola bars is the syrupy part. In the homemade granola, you don't need to boil the brown sugar, honey, butter and maple syrup if you have them (use less than for bars). You toast the dry and wet mixture together in the oven.

With the homemade granola bars you'll use more syrup, you toast the dry ingredients first, then boil the syrupy mixture then mix, let them cool compacted in a tray, cut them up in sizes you like and that's it.

Lesson learned:
  • Takes more effort to make granola bars, I like them, but hubby likes the crispy granola better.
  • Will boil the syrup mixture longer, maybe 6 minutes instead of 3 minutes to make it more "hard candy" mainly I don't have a candy thermometer and they cost a bomb too. I'll stick to old fashioned self estimated timing.
  • Will make sure that I have bulk ingredients next time, and trying with chocolate chips, almond, etc.
  • Will certainly make some for our long-haul flight to the US for hubby as flight food isn't that great after you been groggy and flabby for 20 hours


Tuesday, June 16, 2009

Homemade Granola

My failed attempt of baking granola bars with this recipe I found last month, it turned out too soggy and a slight eggy-smell that I don't enjoy too much and too embarrassed to let anyone try.

Unfazed, I have decided not to use any recipe that calls for a wet mixture. A "homemade granola" goggling lead me to several prominent recipes that I intend to try, omitting quite a few of the ingredients that that is too expensive to splurge on.

From joyofbaking - straight forward recipe with lots of background and tips that is somewhat useful and what to expect from toasting your own granola.

I used the kitchensinkrecipes for my homemade granola, check out her website if you're more interested on the full recipe. Below my recipehack, ingredients I used in red
.

Granola

3 1/2 cups rolled oats
1/2 cup coconut flakes, unsweeteend
3 tablespoons flax seeds
3 tablespoons sesame seeds
1/4 cup sunflower
1/4 cup pumpkin seeds
1/2 cup toasted mixed nuts, chopped (I used pistachios and almonds here) <== I'm planing to put in raw almonds next time
2 teaspoons cinnamon
1 teaspoon sea salt

1/4 cup brown sugar
1/4 cup canola oil <== I used 2 tablespoon of melted butter 2 tablespoons honey 1 tablespoon pure maple syrup
2 teaspoons pure vanilla extract
2 cups mixed dried fruit (I used raisins and dried cherries and cranberries here)

Lesson learned: does not reuse a baking sheet after the first batch, it catches fire easily as it is "crispy". Otherwise, my granola tastes caramel-ly, a better attempt than the 1st.

Hubby and my friend seemed to enjoy snacking on it. I'll be making more as gifts to friends, and also my breakfast~

Saturday, June 13, 2009

It's the weekends!

Slow day for the kitties

Grocery shopping took longer than I thought today, and I always seemed to choose the wrong line, regardless how little the line took this morning when I was checking-out.

In absence of hubby's company early this morning, I have decided to take my colleague's advise to try out the UK-Tesco store-brand items, I bought their chocolate cookies and strawberry jam. Not sure how they will turn out. I've got my milk ready tomorrow morning... MMM... cookies for breakfast!

List of projects to catch-up on (in no particular order):
  • IKEA bag bottom insert
  • Put away the rest of my homeless objects
  • Make toasted oats bar
  • Plant wheatgrass
  • Plant my greens (local spinach & jiu choi)
  • Iron clothes (just got a new ironing board, bought an unstable one)
  • Wash car, maybe wax the car
  • Clean all windows (inside & maybe the outside), and sliding door
  • A shelf above the kitchen trolley with hooks for the cups
  • Bring Dopey to vet, get a cat collar for him
But first, dinner. Can't wait for Sunday.

Monday, June 08, 2009

Late "Spring" Cure 2009

Before: Entire layout

After: Entire Layout

Before: Close-up

After: Close-up


A term used by Apartment Therapy to motivate readers to clean-up and organize their messy spot and post the before and after result on Flickr.

Mine happened late spring and living in a country sitting right on the equator, honestly there's no spring, it's always humid summer.

I did my "Spring" cure last weekend, a long weekend (w00t~! \o/) and finished many projects that was piling since March 09.

I've been looking out for unwanted planks to no avail. I opted to get the soft pine planks from FABIAN, and the wooden brackets (forgotten the name and price, but it's not that expensive), and I've painted them white (Nippon Soft Matt for wood & metal).

I have to admit, I am an IKEA fan, and my corner does look like an IKEA catalogue. I didn't have time to edit the photos with IKEA names & prices on them with IKEA fonts. =)

Thursday, January 01, 2009

Junk story: Whiteboard

Whiteboard found it's way at my corner

The whiteboard was at the refuse room, quick inspection was that it wasn't in a bad state, and a little cleaning-up, it's still decent enough to use it. After long consideration (this was picked-up, maybe last year in May?), I got my brother to get it for me, for I was too shy to go pick it up myself.

I have added cork boards (the rectangle cork trivets from IKEA) next to the whiteboard for the lovely cards I get from time to time, also useful coupons that would crowd the whiteboard too much if you're not careful. Those things tend to invade a magnetic board rampantly. Oh, I love staples guns. Should have gotten one earlier. It's so useful for many small projects I've worked on.

These days, I still look out for worthy pieces and add them to my pile of "treasures" on the deck. From time to time, I get inspired what to do with them. Sometimes, I know what to do with it, just needing an extra paint job or anything that required me to wait till my free-weekend.

I've recently got back into my DIY groove again, mainly by switching our grocery shopping to biweekly. I'll try to plan to get any other pet supplies, DIY materials, etc during the week I'm doing my grocery shopping. Having a free weekend at home does help, though sometimes there are things that suddenly pop-up. Nontheless, the new schedule allows me to have more time to do most of my major projects. Long weekends are definitely a huge plus.


I've also started doing minor projects after dinner during weekdays. Mainly, hubby has been working longer hours, and I take that time to work on smaller projects that doesn't require power tools, but when he's free and not working, I definitely
choose hanging out with him over the projects, cause that's what a home is. =)